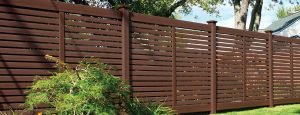
Installing a Vinyl Fence can seem daunting, but with the right guidance, you’ll achieve a perfect outcome. Here at Utah Fencing Company, we want to make the process simple and clear for our customers. This article will help homeowners navigate the essential steps for a successful Vinyl Fence Installation. Whether you’re a DIY enthusiast or planning to hire professionals, we’ve got valuable insights for you.
Contents
hide
Choosing the Right Vinyl Fence
Selecting the best Vinyl fence is the first step toward ensuring a successful installation. Consider the style, color, and design that will complement your home. Additionally, ensure the material’s quality by opting for fences with UV inhibitors to prevent fading and maintaining a fresh appearance for years.
Planning ahead is key. Think about the purpose of your fence—whether it’s for privacy, decoration, or security will influence your choice. Don’t hesitate to ask us for samples or photographs of past projects to help make your decision easier.
Measuring Your Space Accurately
Careful measurement is crucial before purchasing materials. Start by outlining the area you want to fence in with stakes and string. Use a measuring tape to ensure precise dimensions, taking note of slopes and corners.
A tip is to measure twice. Double-checking your measurements can save time and reduce the hassle of making adjustments later. Accuracy will help us provide the exact amount of materials you need, avoiding wastage and additional costs.
Gathering the Necessary Tools
Having the right equipment on hand will streamline the installation process. You’ll need some basic tools like a post hole digger, level, rubber mallet, and a good pair of work gloves.
Consider investing in a quality power auger if you’ll be digging many post holes. If you’re unsure about the specific tools required, we’re always here to provide a comprehensive list tailored to your project.
Setting the Fence Posts
Properly setting your fence posts is one of the most critical steps. Digging the post holes at least a third of the length of the post ensures stability. Use gravel at the bottom for drainage before placing the post in the hole.
Get your Concrete mix ready and pour it into the hole around the post. Use a level to make sure your post is perfectly upright and brace it until the concrete sets. This ensures your fence remains strong and level throughout its lifespan.
Installing Fence Panels
Once the posts are set and the concrete is cured, it’s time to install the fence panels. Attach the panels to the posts using the brackets and screws provided in your installation kit. Ensure that each panel is level and securely fastened.
Start at one end and move along, panel by panel. This methodical approach helps maintain alignment and makes the process more manageable. Don’t rush; taking your time now will prevent issues later.
Maintaining Proper Alignment
Consistent alignment is key to a professional-looking vinyl fence. Use a string line between the posts as a guide, ensuring each panel aligns correctly with the previous one.
If you notice any misalignment, make adjustments early. Small tweaks along the way can make a big difference in the appearance and structural integrity of your fence.
Secure End and Corner Posts
End and corner posts require extra attention due to the additional strain they bear. Use more concrete and ensure these posts are especially sturdy.
Additionally, double-check the alignment of these crucial posts. They set the tone for the entire fence, so getting them right is essential for a flawless finish.
Customizing Your Vinyl Fence
One great advantage of vinyl fencing is its customizability. From decorative caps to lattice tops, small touches can personalize your fence.
We offer a range of accessories that you can choose from. Adding these elements not only enhances the aesthetic appeal but also increases the value of your property.
Routine Maintenance Tips
Proper maintenance ensures your fence looks new for many years. Fortunately, vinyl fences are relatively low-maintenance compared to Wood or metal alternatives.
- Regular Cleaning: Use a garden hose to wash off dirt and debris.
- Inspect for Damage: Check periodically for cracks or loose panels.
- Trim Plants: Vegetation growing against the fence can cause damage over time.
- Avoid Harsh Chemicals: These can cause discoloration or damage to the vinyl.
- Reinforce Posts: Check the stability of posts annually, especially after harsh weather conditions.
When to Call Professionals
Sometimes DIY isn’t feasible or desirable. If you’re short on time or unsure about the installation process, our team is ready to help. Professional installation ensures your fence is installed correctly, quickly, and with minimal disruption to your routine.
Contacting us early can save you headaches down the line. We offer consultation services to help determine whether professional installation is the best option for you.
Conclusion
A vinyl fence can be an excellent addition to your home when installed correctly. At Utah Fencing Company, we’re here to ensure you get the best advice and service possible. Ready to start your project? Call us today at 801-905-8153 or Request a Free Quote.


